Bethel Street Buildout: Custom Window Display

The finished product came out beautifully. As with most DIY projects, I initially thought this would be quick and easy. NOPE! I don't know why I ever think that. Lesson never learned. Here's a quick look at how the process of building our custom window display went!

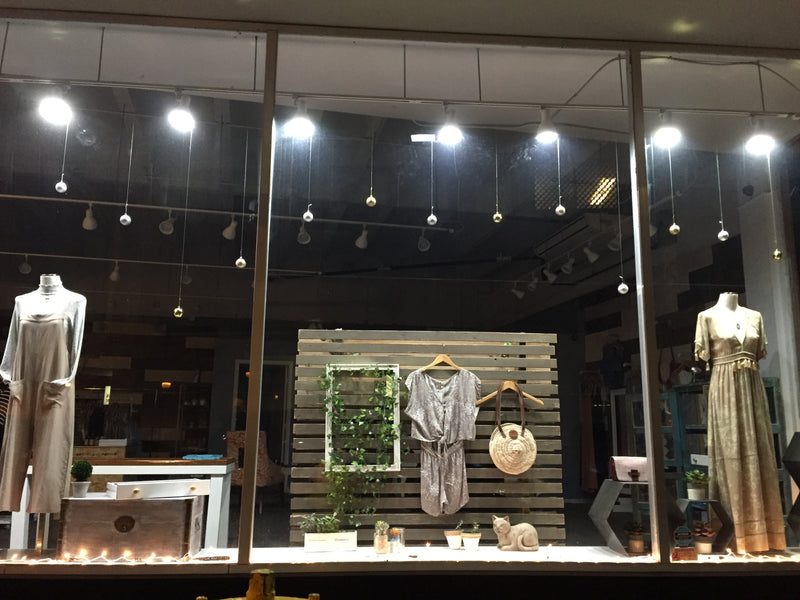
All pretty at night!
The initial idea (after hours of Pinterest) was a display wall made of palettes. I found a picture online that looked all pretty with lights on it and all kinds of wedding decorations. Those DIYers had taken four pallets and turned them into a display. Looked easy enough.
Then, I read somewhere that sometimes the wood comes from grocery stores and may have had raw meat on them and therefore, lots of bacteria. Big turnoff. So, I opted out on the palettes but still wanted to work on this project. I just wasn't sure how I was going to find the right wood.
By chance, I ended up finding exactly what I needed at Reuse Hawaii. Reuse Hawaii is a non-profit located in Kaka'ako which mainly focuses on salvaging materials during home demolitions and sells them as reusable building materials. This reduces landfill waste, creates jobs and provides people like me with cool, affordable materials to give new life to. I was lucky enough to find the pieces for this project in an area marked FREE wood so I scored (this time). The pieces were exactly the same width with a beautiful old paint. I'm guessing they used to be someone's wood panel walls or the wood paneling at the bottom of those old raised homes you see in Hawai'i.
I loaded them up into my little Versa and we all just barely fit. I drove with some pieces knocking against my elbows and one hand off the steering wheel because I decided to load up my car myself with no gloves. I got a nice little splinter for my stubbornness.

Hauling it all home in my little Versa Hatchback
Once I unloaded, I laid them all out to test out if I had enough pieces and how they could fit. I decided it was best to assemble it all in the store since transporting was tough. I worked on getting them cleaned up and ready. HERE is the where the FUN began!
I found myself pulling out so so many tiny staples and nails. It's really not that easy or fun and after about handful I googled tools I could buy for this and headed to Home Depot to pick it up. I ended up with this nifty tool, which my stepdad reimbursed me for because he decided it would be a nice addition to his box! OMG, was that a good call!
After all those nails, I sanded the wood to try and smooth the edges, remove any splintered parts and get this paint to have a beautiful look to it! I wanted some raw wood to peak through the edges. Luckily, I had a corner sander for this. I'm not sure if that was the right tool but it worked all right. Maybe something else would have been faster, but creating our custom window display was definitely a work in (learning) progress. Lastly, the edges were sawed to make the wood even lengths.

A before and after of the wood with the original paint and with sanding
Once transported to the Bethel Street location, it was a breeze to assemble! Some wood screws and a few reinforcements on the bottom and VOILA! A custom wood "palette" display. It sure came out pretty :)

Half done! Putting it all together was the most fun!
I hope this inspires some DIY projects - or at least a trip to check out Reuse Hawai'i. Here's to successful and fun projects, whether you want to build your own custom window display or something else for your home or business!


Finished product photos!